Description
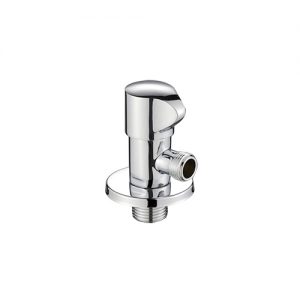
JX-0213
Water Shutoff Valve Compression Outlet
- Size 1/2″FIP X 3/8″OD;1/2″FIP X 1/2″OD
- Zinc alloy handle with chrome-plated
- 125 PSI cold working pressure
- C37700 materials; Lead-free
- It’s in a plastic bag packed with each
- Three million times open-off working is guaranteed
- Certified to 200psi (13.79bar ) and 200°F (93 °C)
- Note: Push-fit items are available for higher temperatures and pressures.
- Ease-of-use Push-fit connection, no soldering, clamps, or glue needed
- It can be used on copper tubing, CTS, CPVC, and PEX
- Hi-Flow tube stiffener included for PEX tubing
- Strong, corrosion-resistant, durable body made of Lead-Free brass
- Certified for use in hydronic heating and potable water.
- It comes with a 1-year warranty.
- Suitable for water supply systems, civil construction piping systems
- It can be used as a shutoff valve or water saver valve and installed between the shower arm and the shower head to control the flow of water
- Function: Kitchen, Home, Garden, and General
- Style: Handle-controlled
- The short switch design is not visible behind the small size showerhead
- Solid stainless steel construction, rust-resistant, sturdy and durable
- The black appearance has luxurious temperament elements, which is convenient for use and installation
How to Install An Angle Valve?
Angle valves are pretty easy to install. They are highly durable and reliable. Only a few careful steps in a series can be a lot helpful. We often came across such events when installing valves on our own. It might be because of leakage or malfunctioning. Instead of rushing to a plumber, you can get your hands on it at such times.
It performs dual functions in some cases. By acting as both a shutoff and regulator, it serves economically. Different types of angle valves have other installation methods. Before starting the procedure, let’s find out the material required.
Required Material:
- You are going to install a new angle valve.
- A knife.
- A pipe cutter tool.
- A brush to clean the pipe.
- Emery cloth.
Below are the instructions to install angle valves at home with effort.
Instructions to Install Angle Valves:
Water leakages or pipeline damage can be a frustration. They often cause nasty effects. To avoid this, we will learn how to install angle valves for the first time in a pipeline.
-
- First of all, to start the procedure, cut off the water supply to your entire home. It is necessary because open pipes would waste away many quantities of water. Look out for the central water controller in your house. Then shut it off for a time until you’ve installed the valve.
- You must plan where to install the valve for the second step. Figure out the best area you think is sensitive in your house plumbing. You need to fix some pipes underneath the bathroom or kitchen.
- You have selected the pipeline and area where you will install this time. Now, take a pipe cutter. It is a small tool that is readily available. It cuts the pipe where you want to install the valve. Place it well around the pipe, and its blades cut the pipe out there.
- When pipe cutting is finished, you need to remove any irregular waste. Take it out with the help of a knife we mentioned in the required material. This removal ensures the smooth functioning of the valve. Otherwise, the angle valve would not work as expected.