Due to their softness, copper pipes can be bent easily by hand. However, their delicate nature prevents them from bending easily and precisely. Copper tubing can collapse and crimp without specialized equipment or techniques such as collapses and crimps.
There are several secure and straightforward methods for bending the spring copper pipes. One method employs a low-cost spring kit to prevent the pipe from crimping. Alternatively, fine sand or common salt may be used.
Tips for Bending Copper Pipe
· Shape the bend:
To achieve the ideal curve, maneuver the pipe over a larger pipe, a padded knee, a metal can, or a pipe.
· Bend slowly:
To maintain a consistent copper bend along the entire length of the copper pipe, bend it gradually.
· Support the pipe:
Maintain support for the copper pipe throughout its entire curved length to regulate the curve and avoid collapse.
Read more: Copper Vs. Pex Pipe: How To Choose
What You’ll Need
Materials
Bend Copper Pipe with a Spring
Copper pipe
Equipment / Tools
Bend Copper Pipe with a Spring
- Soft cloth
- Indelible marker
- Deburring tool
- Spring tubing bender kit
Method 01: How to Bend Copper Pipe with a Spring?
Bending springs copper pipe are inserted into or over the copper pipe to support and distribute the force more effectively. Pipe bending springs can undergo bending of up to 180 degrees. To accommodate copper pipe tubes, kits of tube springs are available in sizes spanning from 1/4-inch to 5/8-inch in diameter.
1. Set up the bend location.
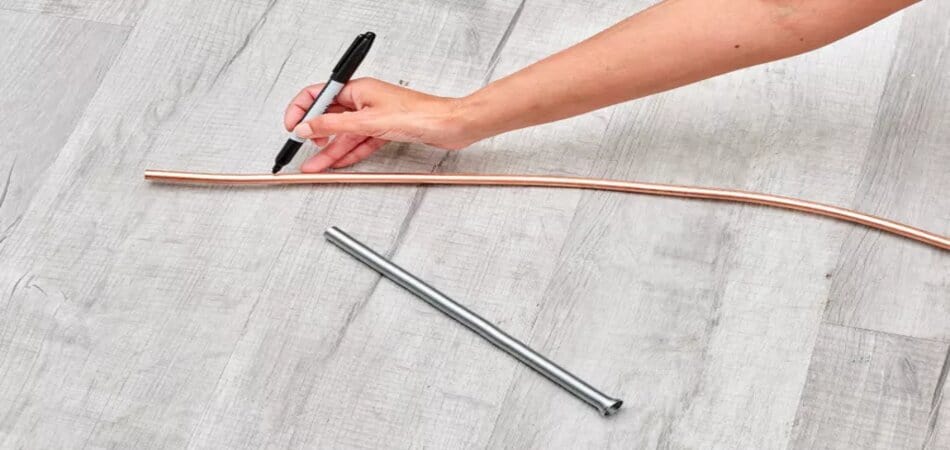
Indicate with an indelible marker on the copper tubing bending the precise location where the bend will be made. The mark must be positioned at the farthest point of the radius of the curvature.
2. Smooth off burrs.
Cleaning any burrs from the copper pipe’s cutting end is necessary.
3. Select spring.

Select the spring size that corresponds to the tubing. While some springs are designed to fit inside the pipe, others are intended to fit around its exterior. If the spring exceeds the pipe’s length, retrieving it by flexing the pipe is suitable. When the spring is shortened, affix a wire to its terminus.
Read more: Flare Fittings Vs. Compression Fittings
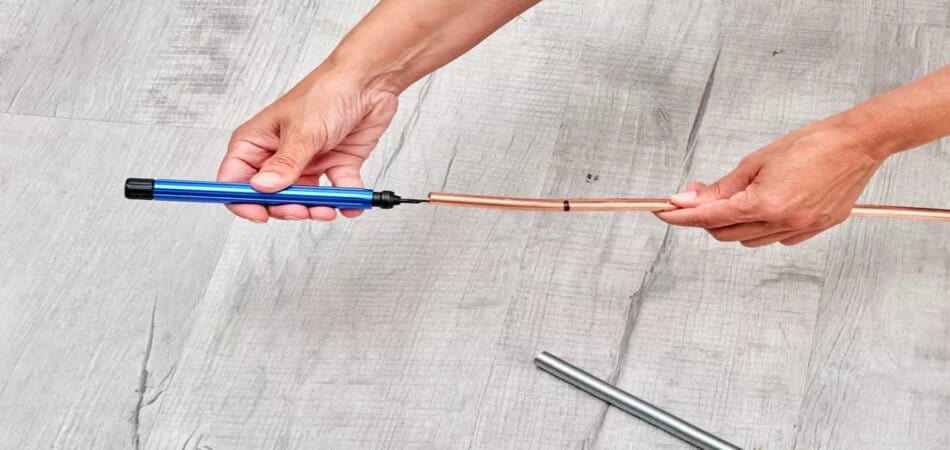
4. Insert the pipe or spring.
Whether the kit specifies the copper pipe into the spring or the spring into the pipe, insert the spring into the pipe.
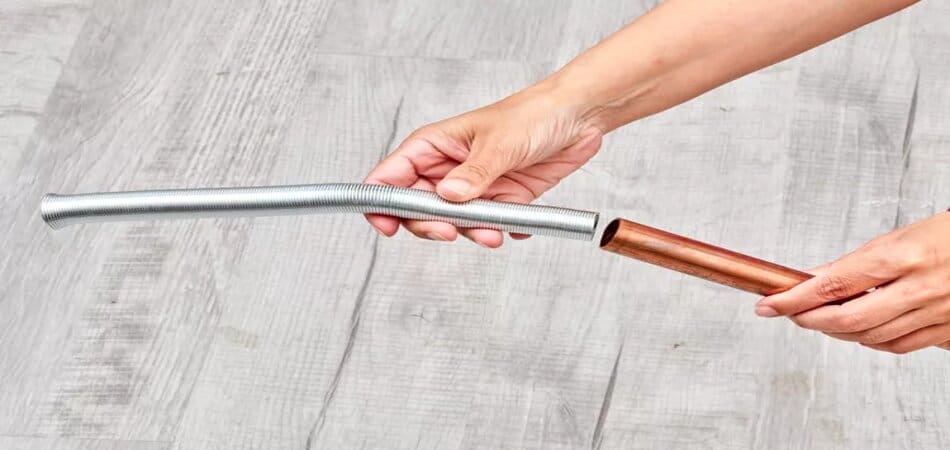
5. Bend the pipe of copper.

After softening the copper pipe with a soft cloth, bend it over your knee. To achieve a seamless bend, move the pipe back and forth to your knee’s left and right sides.
Read more: Use Guide to Compression Fittings on Copper Pipes.
6. Remove the pipe or spring.
Remove the pipe or spring. Turn the spring clockwise as you draw it out if it proves challenging to remove.
Method 2: Using a Pipe Bender

1. Open the handles of the pipe bender all the way.
You maintain a 180-degree angle with the long handle, which you will use to shape the object while raising the short handle to that position. Also, the tubing can be inserted, and the bend radius can be initiated with enough clearance.
Moreover, to calibrate bends at precise angles, ensure that the faceplate of the bender, which is the rounded component atop the longer handle around which the bending tubing is, passes and is oriented in your direction when using your soft copper tube bender tool.
2. Disengage the tube latch.
Apply pressure to the grooved hand segment of the clasp until it completely retracts into the down position. In most models, the tube lock must be removed before the tube can be inserted. Pipe bender tube closures may manifest as uncomplicated hooks that suspend above the pipe or tube after insertion into the tool.
3. Mark the copper tubing where you want to make the bend.
Create one or more lines along the upper surface of the tube using a felt-tipped marker. If needed, use a ruler or measuring tape to ensure perfect precision in the positioning and spacing of each bend.
- A series of lines can also help you keep track of each bend point when performing many or compound bends.
- Before trying to shape the tube, marking it will ensure that the bend is positioned correctly.
4. Slide the copper tube into the pipe bender.
By threading an open end of the tube into the space between the two handles. Confirm that the tube and the groove in the rounded bender die are aligned. Insert the pipe into the bender until the bender supports the designated section die. Benders for pipes and tubes can form bends in any section, including the edges. The tubing will curve around the bender die as the handles of the device are closed, preventing it from kinking or collapsing.
5. Secure the tube latch.
Grasp the clasp once more above the tube. It ought to clack as it becomes secured in position. The clasp will ensure the tube is in place while the required adjustments are executed following its closure. The tube fastener is engineered to fasten onto the tubing without impeding the ability to make improper adjustments.
6. Align the bend point.
Align the marked bend point with the intended radius of the copper pipe bent. Lower the short handle by bringing the notched roll support into contact with the upper surface of the tube. If needed, insert the tube deeper into the apparatus to position the intended bend point at the bend angle specified on the bender die’s faceplate.
- Ensure that the markings on both components are identical. With the handles open, the number ‘0’ should correspond to the number ‘0’ on the bender die faceplate.
- The guide markings on different pipe bender tools may vary depending on the model.
7. Close the handles to make the bend.
While maintaining a steady grip on the long handle, depress the short handle fluidly. The tubing will encircle the circular bender pass-on due to the pressure generated during this process. Stop progressing the handle when the ‘0’ on the roll support aligns with the corresponding notation of the intended bend radius. To remove the short handle after bending the pipe for copper, elevate it once more. To ensure the accuracy of your work, use a protractor to verify the angle of the bend.
Use a Pipe Bending Tool to Bend the Pipe
A pipe bender is a compact, low-cost, specialized instrument that performs a single function well. It bends copper and other flexible metal pipes of varying diameters to a predetermined 2 to 3-inch radius.
A pipe bender, which resembles a pair of forceps, facilitates the insertion of pipelines along its midpoint. The degree of the curvature is denoted by a marked gauge ranging from zero to ninety degrees.
The pipe benders’ secret is the instrument’s uppermost component, and they follow the bend to ensure a clean finish.
Applications of copper pipe
Copper water supply pipelines are used in residential settings. Due to their attractive qualities, these pipelines are additionally employed as manufacturing materials. Although copper is malleable and user-friendly, it lacks the flexibility to undergo flawless bending by itself. Pipe collapse may result from attempting to bend copper pipelines without specialized equipment; thus, irregular margins at the bend point may replace the desired smooth curve. This may restrict water flow in plumbing and distort the aesthetic appeal of crafted items.
Summary
Copper tubing bending costs a premium. If you try to bend copper for a plumbing endeavor that fails, hiring a qualified plumber is more economical than buying replacement pipes. For more details about our product, contact us today!