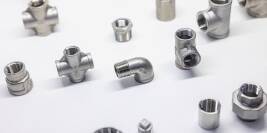
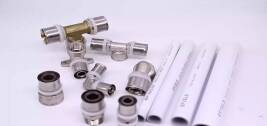
Valve sampling is generally used to confirm product specifications, materials, dimensions, connections, performance, appearance, and customization requirements before mass production, and to provide a reference for subsequent production inspection. The sampling process starts with confirmation of purchasing requirements and drawings. Once the sample is completed, it is measured and tested against the approved requirements.
In this guide, Plumberstar draws on practical experience in residential valve sampling and mass production to explain the key control methods from Sample Production and Sample Approval through Mass Production Verification.
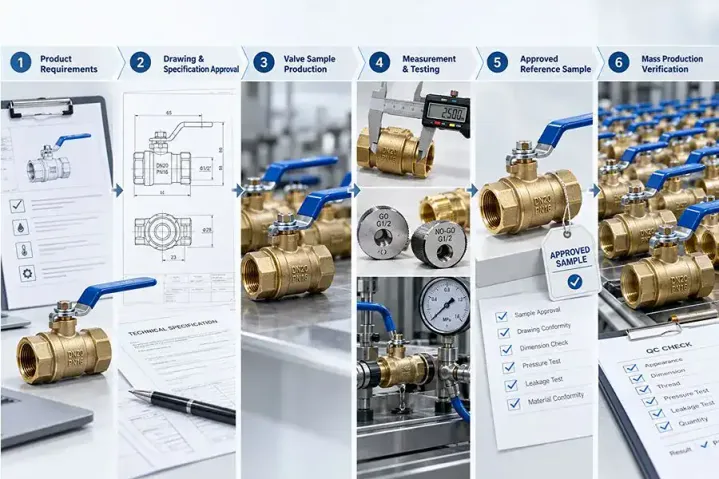
Valve Sampling Process Flow
1. When Valve Samples Are Required
When the purchase is for a standard product tested and developed by the supplier over a long period of time, and the same dimensions, materials, connections, certificate, Finish, and packaging are being used, a sample can be taken directly from the current production, for confirmation. In the case of newly developed models, OEM / Private Label products, non-standard sizes, new Connections, new material configurations, or products in which changes are made to the Handle, Logo, Marking, Finish, or Packaging, sampling is usually required prior to mass production.
Different sample purposes should be clearly distinguished. A Stock Sample is mainly used for an initial review of the supplier’s existing product. A Pre-production Sample verifies the final approved specifications, materials, and customization requirements. After approval, the sample can be retained as an Approved / Reference Sample for comparison of appearance, assembly, and consistency during subsequent mass production.

Comparison of Three Sample Types
2. Requirement and Drawing Confirmation Before Sampling
Ensure that a set of consistent, approved requirements is used to confirm product requirements, technical documents, and acceptance criteria before arranging Sample Production. This prevents the need to make constant changes in the specifications or evaluation criteria after the sample is finished.
1) Confirm Purchasing Specifications, Application Requirements, and Customization Details
Prior to sampling, verify Valve Type, Size, Connection, Body Material, critical internal parts, Working Medium, Pressure, Temperature, and the Logo, Handle, Marking, and Packaging requirements.
2) Approve the Drawing and Specification and Define the Document Revision
Once the product specification is completed, the Drawing and Specification must be approved prior to arranging sampling. The drawing must clearly show all pertinent dimensions pertaining to installation and interchangeability such as Overall Length, Height, Inlet / Outlet, Thread Specification, Thread Length and Connection Dimension.
When the drawing changes make a new Revision. For instance, if Rev.A is changed for Thread Length and is updated to Rev.B, then all the Sample, Purchase Order and then Mass Production should be Rev.B.
3) Define Measurement Items, Test Standards, and Acceptance Requirements
Determine the need for Sample Inspection prior to sampling. Identify Critical Dimensions, Connection / Thread, Pressure, Leakage, Function, Appearance and special functional items to be examined and provide the measurement method (how to measure), the test standard (standards to be adhered to) and the acceptance criteria (criteria to be satisfied).
4) Produce the Sample to the Approved Drawing
Once the Drawing, Specification and acceptance requirements have been approved, proceed with Sample Production as per approved Drawing and Specification. The sample should use the same Material, Components, Mold / Tooling, Machining Process, Surface Treatment and Assembly Method to be used in the subsequent Mass Production, wherever possible.
3. Valve Sample Specification Verification and Quality Evaluation
Once the sample is finished, check the critical items and test them against the Approved Drawing, Specification and Sample Inspection Requirements. The following items are typical of the types of inspection criteria used for residential valve samples:
| Category | Typical Inspection / Measurement Items | Acceptance Basis |
| Critical Dimensions | Overall Length, Height, Bore Diameter, installation dimensions, and other critical dimensions specified on the drawing | Approved Drawing and specified tolerances |
| Connection Ends and Threads | Connection Type, Thread Type, Size, Pitch / TPI, effective thread length, thread form, burrs, and machining completeness; use a GO / NO-GO Gauge and perform actual mating-connection assembly where required | Approved Drawing + applicable NPT / BSPP / BSPT / Compression / PEX / Press connection standards |
| Structure and Opening / Closing Function | Full Port / Standard Port, Ball / Disc / Stem structure, Handle position, smooth operation, binding or sticking, and fully open / fully closed positions | Approved Drawing / Product Specification |
| Body Pressure Test | Check the valve body, bonnet, and connection areas for external leakage, cracks, or abnormal deformation at the specified pressure | Applicable product standard or agreed Test Pressure, Medium, and Holding Time |
| Seat Leakage Test | Check seat sealing and internal leakage with the valve in the closed position | Applicable product standard or agreed Leakage Acceptance Criteria |
| Appearance and Finish | Scratches, pitting, burrs, exposed base material, plating uniformity, color, and surface quality | Approved Sample / Finish Specification |
| Logo, Marking, and Packaging | Logo content, position, size, orientation, and legibility, plus Label, Barcode, individual box, and carton information | Approved Artwork / Packaging Specification |
| Special Functional Tests | Check Valve non-return performance, PRV outlet pressure adjustment, Float Valve opening / closing and water level control, Mixing Valve temperature adjustment, etc. | Applicable product Specification or product standard |
1) Verify Valve Type, Materials, and Critical Components
Check the Valve Body, Stem, Ball / Disc, Seat, Seal, Handle and other major structures and components against the Drawing, Specification and order requirements when received to ensure that the actual configuration is as per approved order requirements.
Confirm materials using other confirmation tools agreed with the party such as Material Record, Material Certificate etc.
2) Inspect Dimensions, Threads, and Connection Ends
Critical Dimensions that impact installation, connection and interchangeability should be given priority in dimensional inspection. Common parameters for these products like Angle Valves, Ball Valves, and Stop Valves are Inlet, Outlet, Thread, Connection Length, Overall Length, and parameters for installation clearance.
Beyond Checking the Thread Specification, look for machining problems like Burrs, Damaged Threads, Incomplete Threads or a lack of effective thread. If a Gauge requirement is given, use the appropriate GO / NO GO Gauge and, if appropriate, check for fit by fitting the actual mating connection.
Valve Dimensional Inspection
3) Inspect Appearance, Finish, Logo, Marking, and Packaging
If OEM / Private Label, then check the Finish, Handle, Logo, Body Marking, Label, Individual Box and Carton. Look for the Logo regarding its content, positioning, orientation, size and method of application. These are the key issues to watch for in the Finish: Color Difference, Scratches, Exposed Base Material, Blisters, Pitting, and Uneven Plating / Coating. In Packaging, check the Model No., Barcode, Certification Mark, Label and Carton Marking. When appearance components (e.g. Scratches, Pitting, Color Difference, Plating Marks) are hard to quantify, establish a Limit Sample / Defect Reference or approved photographs at Sample Approval as the appearance acceptance reference for subsequent mass production QC.
Appearance Quality Evaluation
4) Pressure, Sealing, and Functional Testing
Set test items based on the Valve Type. Opening /Closing Operation, Body leakage, and Seat sealing are the three aspects where inspection is required on the typical shut-off valves. In terms of the Ball Valve, focus should be on its open/close state, function and seal ability. A Check Valve must be checked for Flow Direction and Non-Return Function. A PRV needs an Outlet Pressure Adjustment check while a Float Valve needs Opening, Closing and Water Level Control checks.
Use the following Test Pressure, Holding Time and Acceptance Criteria as specified in the product specification, applicable standard or agreed by buyer and supplier for the product.
5) Verify the Sample Model Against the Product Certification Scope
Ensure that the product is the actual purchased model if certified products (e.g, cUPC, NSF, WRAS, ACS, CSA) are involved and ensure the actual purchased model is within the scope of the applicable Certificate or Listing. Match Manufacturer, Product Family, Model, Size and Material with certification documents.
Where a supplier has a certification it is not necessarily valid for all sizes, materials and configurations of the valve. If the project has certification requirements in the target market, ensure the particular model is checked at the Sample Approval stage.
4. Valve Sample Approval
Upon Sample Inspection, resolve the deviations and verify the changes and ensure that the final sample, drawings and specifications are formally approved and retained as the controlled reference for subsequent Mass Production.
1) Record Sample Deviations and Required Changes
After Sample Inspection, record each specific deviation rather than simply stating Not OK or Finish needs improvement. Record the Requirement, Actual Result, and Required Action directly. If a Thread Gauge check fails, also identify the specific Connection, Gauge Type, and inspection result.
This allows the revised sample to be retested directly against the issues identified during the first inspection and helps both the buyer and supplier confirm which issues have been closed.
2) Resubmit and Retest the Modified Sample
Once the sample has been changed, decide on the retest scope, according to the actual changes. If it only fixes text, recheck the modified packaging file or packaging sample. Revalidate affected dimensions, assembly, and function if the change involves the Thread, Seat Material, Stem, Valve Body Structure, Connection, or Seal. The retest scope should be specific and similar to the actual change, focusing on the areas that could impact Fit, Function, Safety, Compliance or the approved appearance.
3) Confirm Consistency Between the Final Drawing, Specification, and Sample
When you have tested your revised sample, finalize the revisions on the Drawing and the Specification. Ensure that the Final Drawing, Final Specification, and the Revised Sample are on an equivalent level of approval and having common technical parameters. The Drawing would help you in controlling the dimensions and structure while the Specification will help you in managing materials, performances and testing parameters. It would be the Approved Sample which will confirm the finish, color, logo, handle and assembly condition.
4) Written Approval and Retention of the Approved Sample
The final approval record may include Product / Model, Sample ID, Drawing Revision, Specification Revision, and Approval Date. Where necessary, it may also record the Material Batch or Production Lot. For long-term purchasing or repeat orders, retain a physical Approved Sample. Where practical, the Buyer and Supplier should each keep one sample for direct comparison during subsequent production and shipment inspection.
Approved Sample
5. Production Verification: Consistency Between Mass Production and the Approved Sample
Following Sample Approval, put the Approved requirements into Mass Production and ensure that production units are consistent with the Approved Sample.
1) Freeze the Final Revision and Control Changes Before Mass Production
After the Approval of Sample, it must be ensured prior to mass production that all Purchase Order, Drawing Revision, Spec. Revision, and Approved Sample ID pertain to the same final revision. This will form the basis for the release of production. In case any of the Material, Components, Connections, Surface Treatments, or any other approved material requires change in the course of production, the same should be confirmed before making the change.
2) Verify Critical Technical Items on the Initial Production Lot
When moving from Sample Production to Mass Production, first verify the First Piece / Initial Production Sample. Focus on confirming that the Critical Dimensions, Thread / Connection, Material, and Function match the approved requirements. For Pressure Tests and Leakage Tests specified for 100% inspection, test every unit. Verify other dimensions, materials, and functional items by sampling in accordance with the QC Plan.
3) Check Finish, Marking, and Packaging Consistency
Before shipment through mass production, products from various Production Lots and Cartons should be selected and compared in terms of the appearance, Marking, and Packaging that have been approved for the Sample against those of the Approved Sample, Final Artwork, and final package documents. There shouldn’t be any color discrepancy between them.
Mass Production Verification
6. Summary
Valve Sampling can follow this process: Requirement → Drawing & Specification Approval → Sample Production → Sample Measurement & Testing → Sample Approval → Production Verification. The key is to convert the approved sample, drawings, and technical requirements into executable QC criteria for mass production, ensuring that the initial production lot and subsequent orders remain consistent with the Approved Sample.
If you are developing a new valve project, Plumberstar can support sample development, drawing confirmation, testing, and mass-production verification. Contact us to discuss your product specifications and sampling requirements.